

Installing and Updating BiXBiT Firmware on Whatsminer Devices
Before choosing a flashing method, check the model of the installed control board. You can do this using WhatsminerTool:
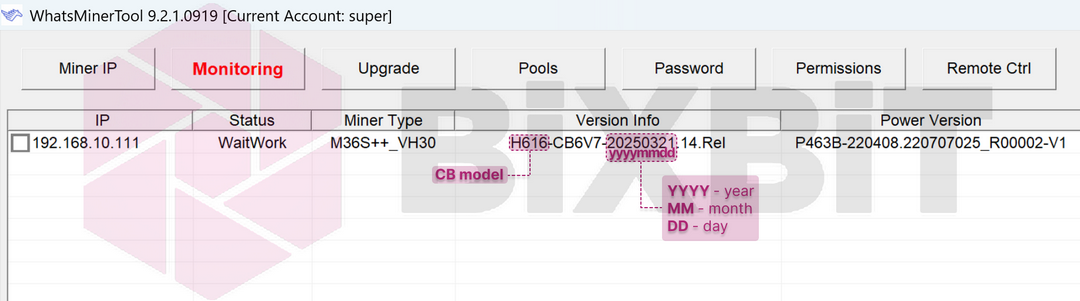
or view it in the Status -> Overview tab in the ASIC's web interface:
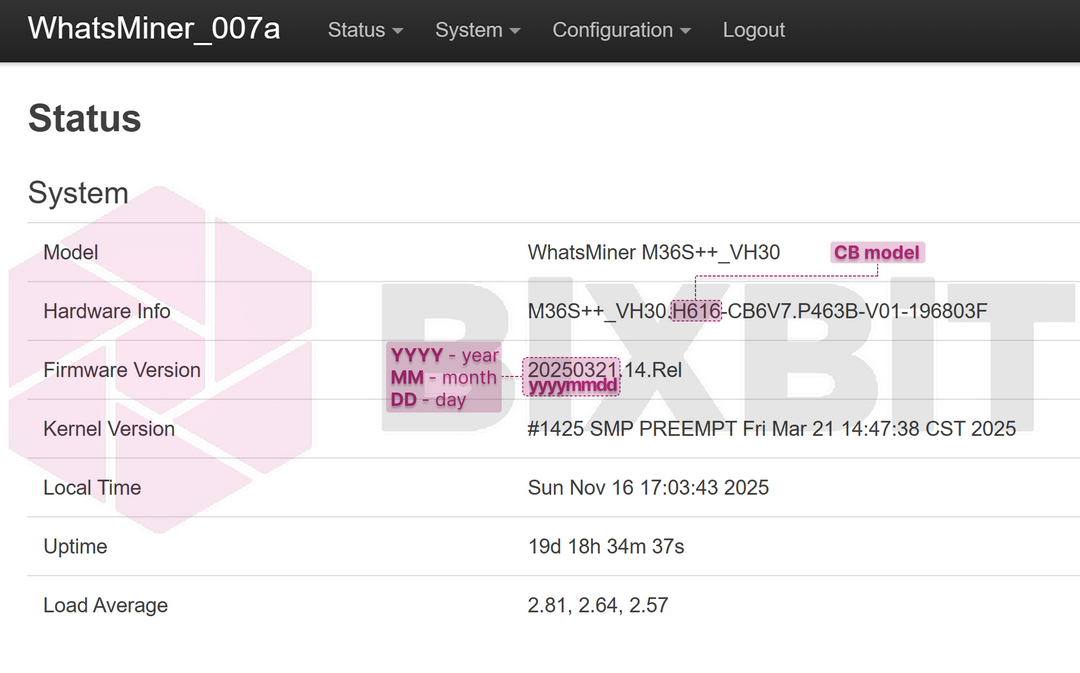
If Your Device Has an H3, H6, or H6os Control Board
Run WhatsMinerTool and set a scan range that includes the IP address of the device for firmware installation. Start the scan and make sure the device appears in the list.
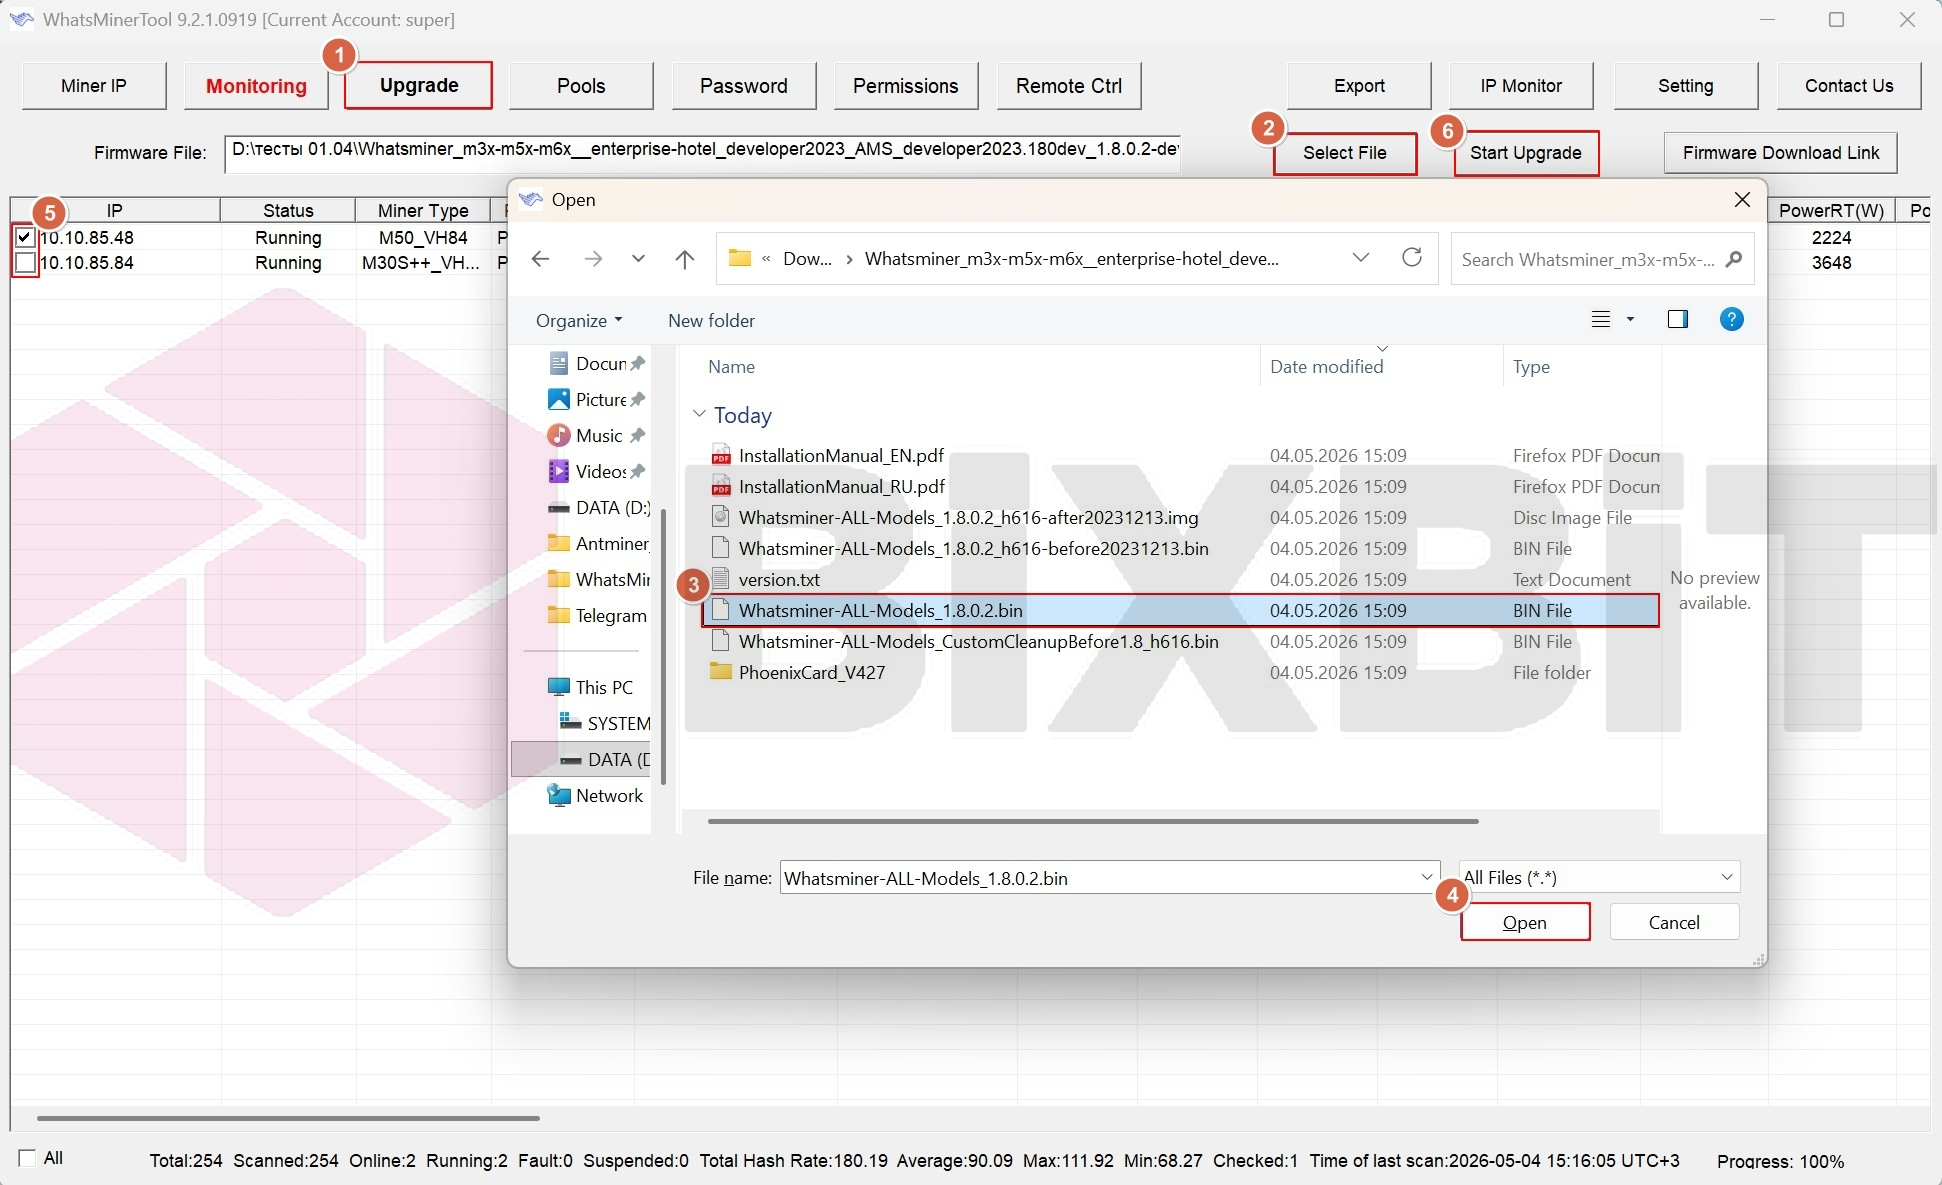
- Step 1: Click [Upgrade] ①.
- Step 2: Click [Select File] ②.
- Step 3: In the pop-up window, select the file "Whatsminer-ALL-Models_X.X.X.X.bin" ③ from the archive you previously downloaded and extracted (X.X.X.X is the firmware version).
- Step 4: Confirm the file selection by clicking [Open] ④.
- Step 5: Check the box to the left of the IP address of the device ⑤ whose firmware you want to update. You can select multiple devices, if they have H3, H6, or H6os control boards installed.
- Step 6: Click the [Start Upgrade] button ⑥ to start the update process. In the dialog box that appears, click [OK].
INFO
A status of Success in the Status column for the device being updated indicates that the installation process completed successfully. The device will then automatically restart.
If Your Device Has an H616 Control Board
Installing BiXBiT Firmware Over a Stock Firmware Version
Stage 1. Writing the Firmware Image to an SD Card:
- Step 1: Prepare the SD card: It is recommended to use SD cards with a capacity from 2 GB to 16 GB inclusive. Fully format the SD card using Disk Management (right-click on the Start button, select Disk Management, file system format – FAT32).
- Step 2: Using the "PhoenixCard" program (the folder with the "PhoenixCard" program is located in the firmware archive), write the image "Whatsminer-ALL-Models_X.X.X.X_h616-after20231213.img" from the downloaded firmware archive (X.X.X.X is the firmware version) to the SD card.
Stage 2. Flashing the ASIC Miner Using the SD Card:
- Step 1. Before inserting the SD card, disconnect the power cable and wait for the indicators to stop blinking completely.
- Step 2. Insert the SD card and reconnect the power cable.
- Step 3. After the flashing process is complete, only the green indicator will be lit. Wait a few seconds, then disconnect the power cable again.
- Step 4. Make sure the indicators have completely turned off, then remove the SD card.
- Step 5. Reconnect power.
Updating BiXBiT Firmware Over Version 1.7.X.X and Older
In the firmware archive, there is a file named "Whatsminer-ALL-Models_CustomCleanupBefore1.8_h616.bin". This file should be used ONLY to update previous versions (up to 1.7.x.x inclusive) of BiXBiT firmware to the current version and ONLY for H616 control boards.
Run WhatsMinerTool and set a scan range that includes the IP address of the device for firmware installation. Start the scan and make sure the device appears in the list.
Stage 1. Installing the Intermediate Firmware Version:
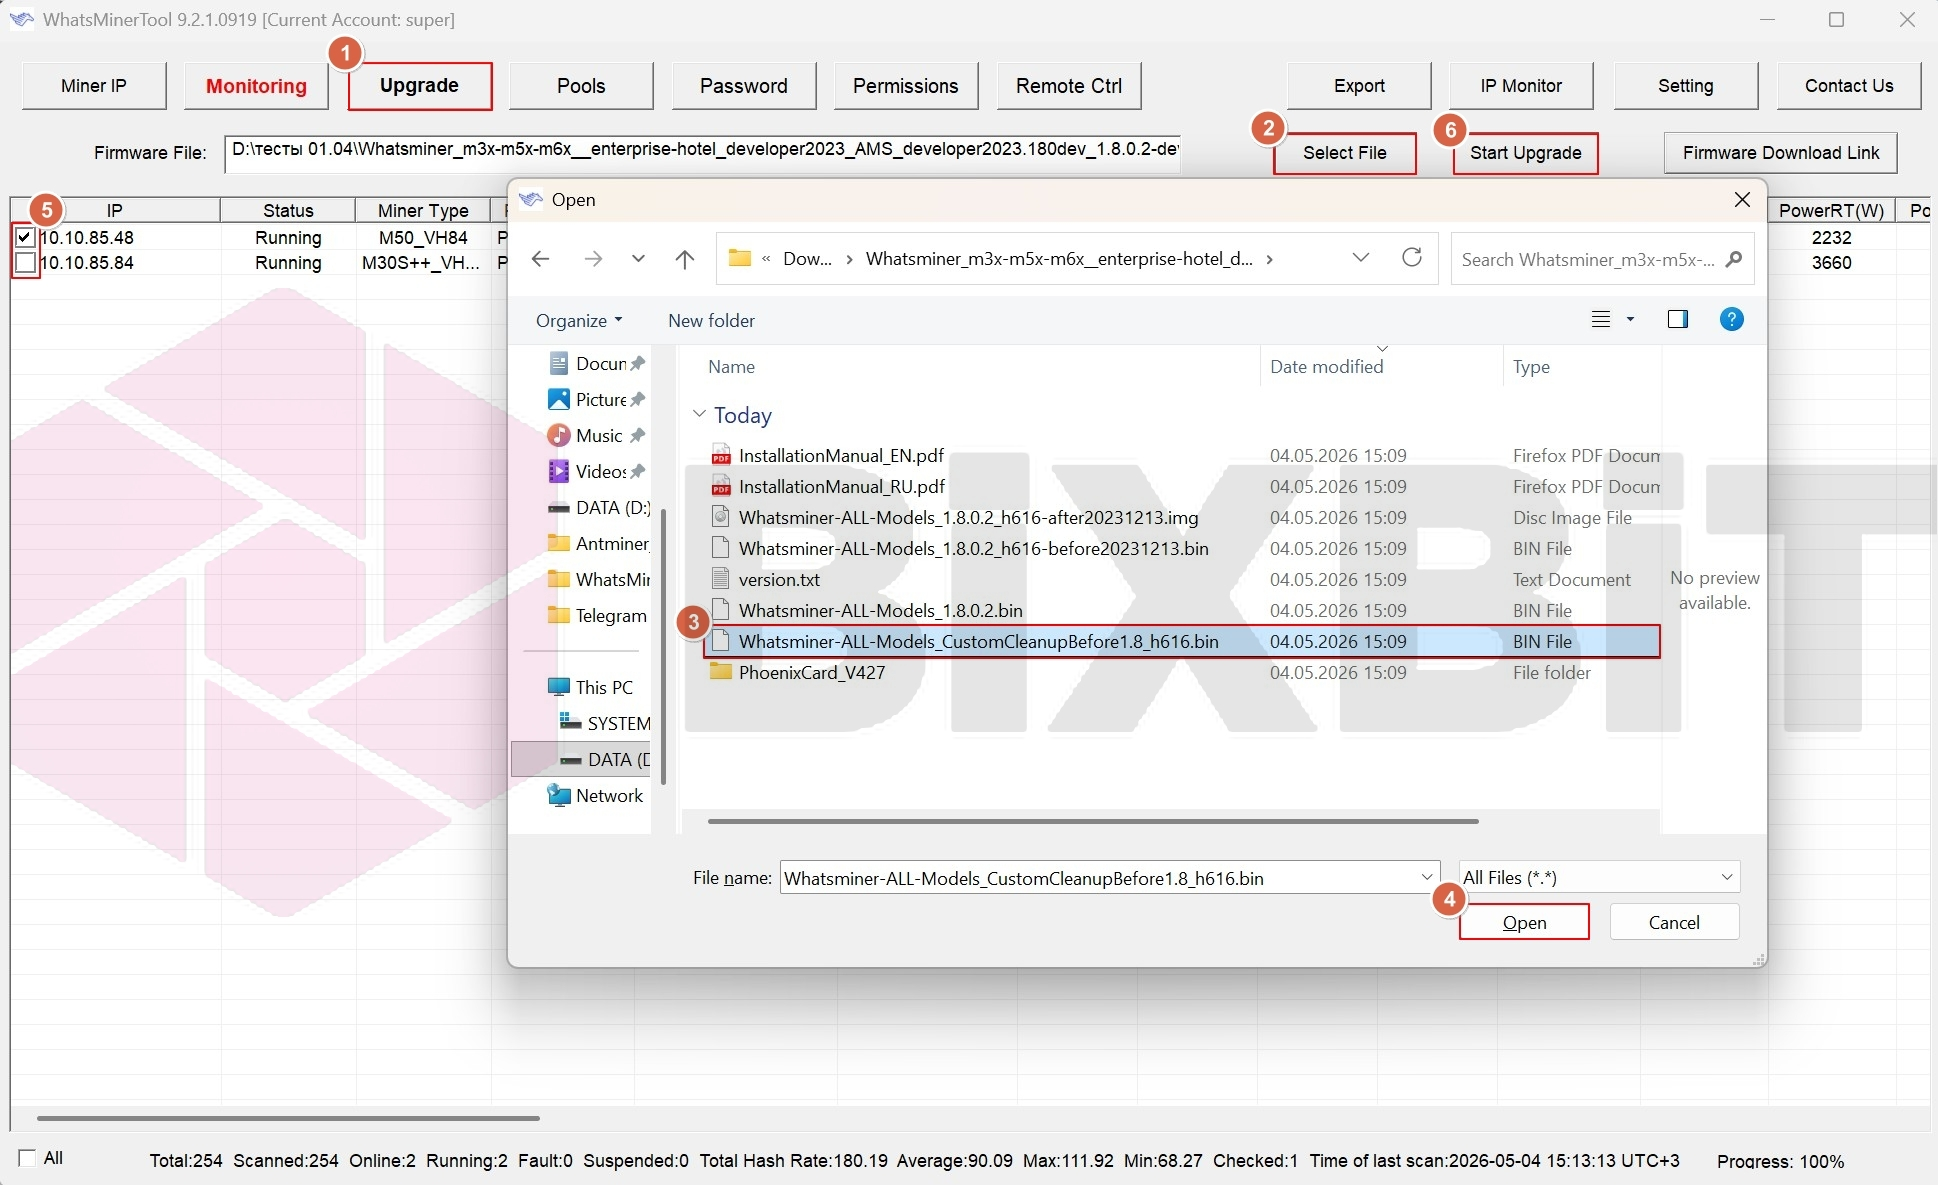
- Step 1: Click [Upgrade] ①.
- Step 2: Click [Select File] ②.
- Step 3: In the pop-up window, select the file "bixbit_before_1.8.bin" ③ from the archive you previously downloaded and extracted.
- Step 4: Confirm the file selection by clicking [Open] ④.
- Step 5: Check the box to the left of the IP address of the device ⑤ whose firmware you want to update. You can select multiple devices if they have outdated BiXBiT firmware installed.
- Step 6: Click the [Start Upgrade] button ⑥ to start the update process. In the dialog box that appears, click [OK].
INFO
A status of Success in the Status column for the device being updated indicates that the installation process completed successfully. The device will then automatically restart. After successfully installing the intermediate file, the firmware version will be displayed with the suffix "CustomNeedUpgrade".

Stage 2. Installing the Main Firmware Version:
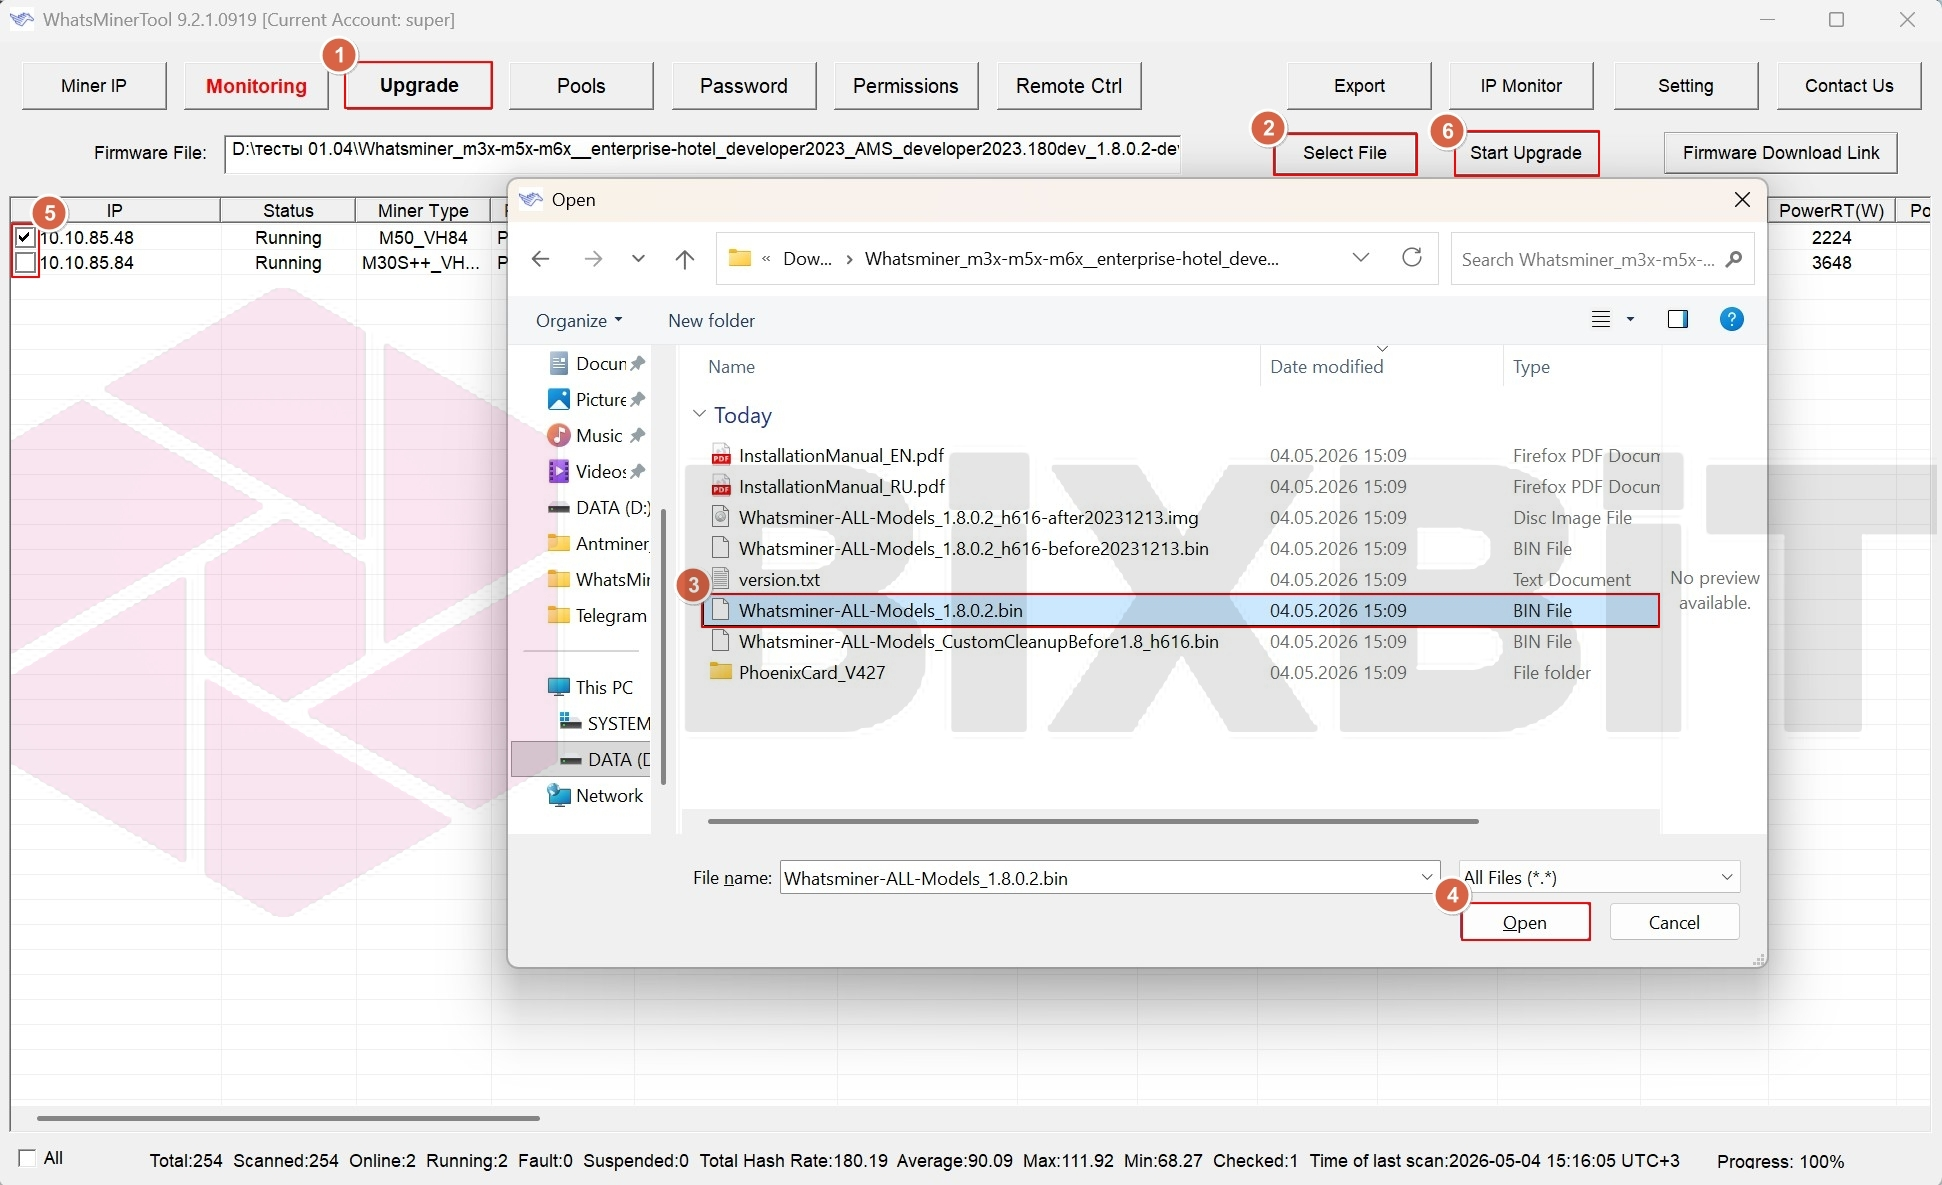
- Step 1: Click [Upgrade] ①.
- Step 2: Click [Select File] ②.
- Step 3: In the pop-up window, select the file "Whatsminer-ALL-Models_X.X.X.X.bin" ③ from the archive you previously downloaded and extracted (X.X.X.X is the firmware version).
- Step 4: Confirm the file selection by clicking [Open] ④.
- Step 5: Check the box to the left of the IP address of the device ⑤ whose firmware you want to update. You can select multiple devices if they had the intermediate firmware version installed.
- Step 6: Click the [Start Upgrade] button ⑥ to start the update process. In the dialog box that appears, click [OK].
INFO
A status of Success in the Status column for the device being updated indicates that the installation process completed successfully. The device will then automatically restart. After successfully installing the main file, the firmware version will be displayed without the "CustomNeedUpgrade" suffix.
Updating BiXBiT Firmware Over Version 1.8.0.X
Run WhatsMinerTool and set a scan range that includes the IP address of the device for firmware installation. Start the scan and make sure the device appears in the list.
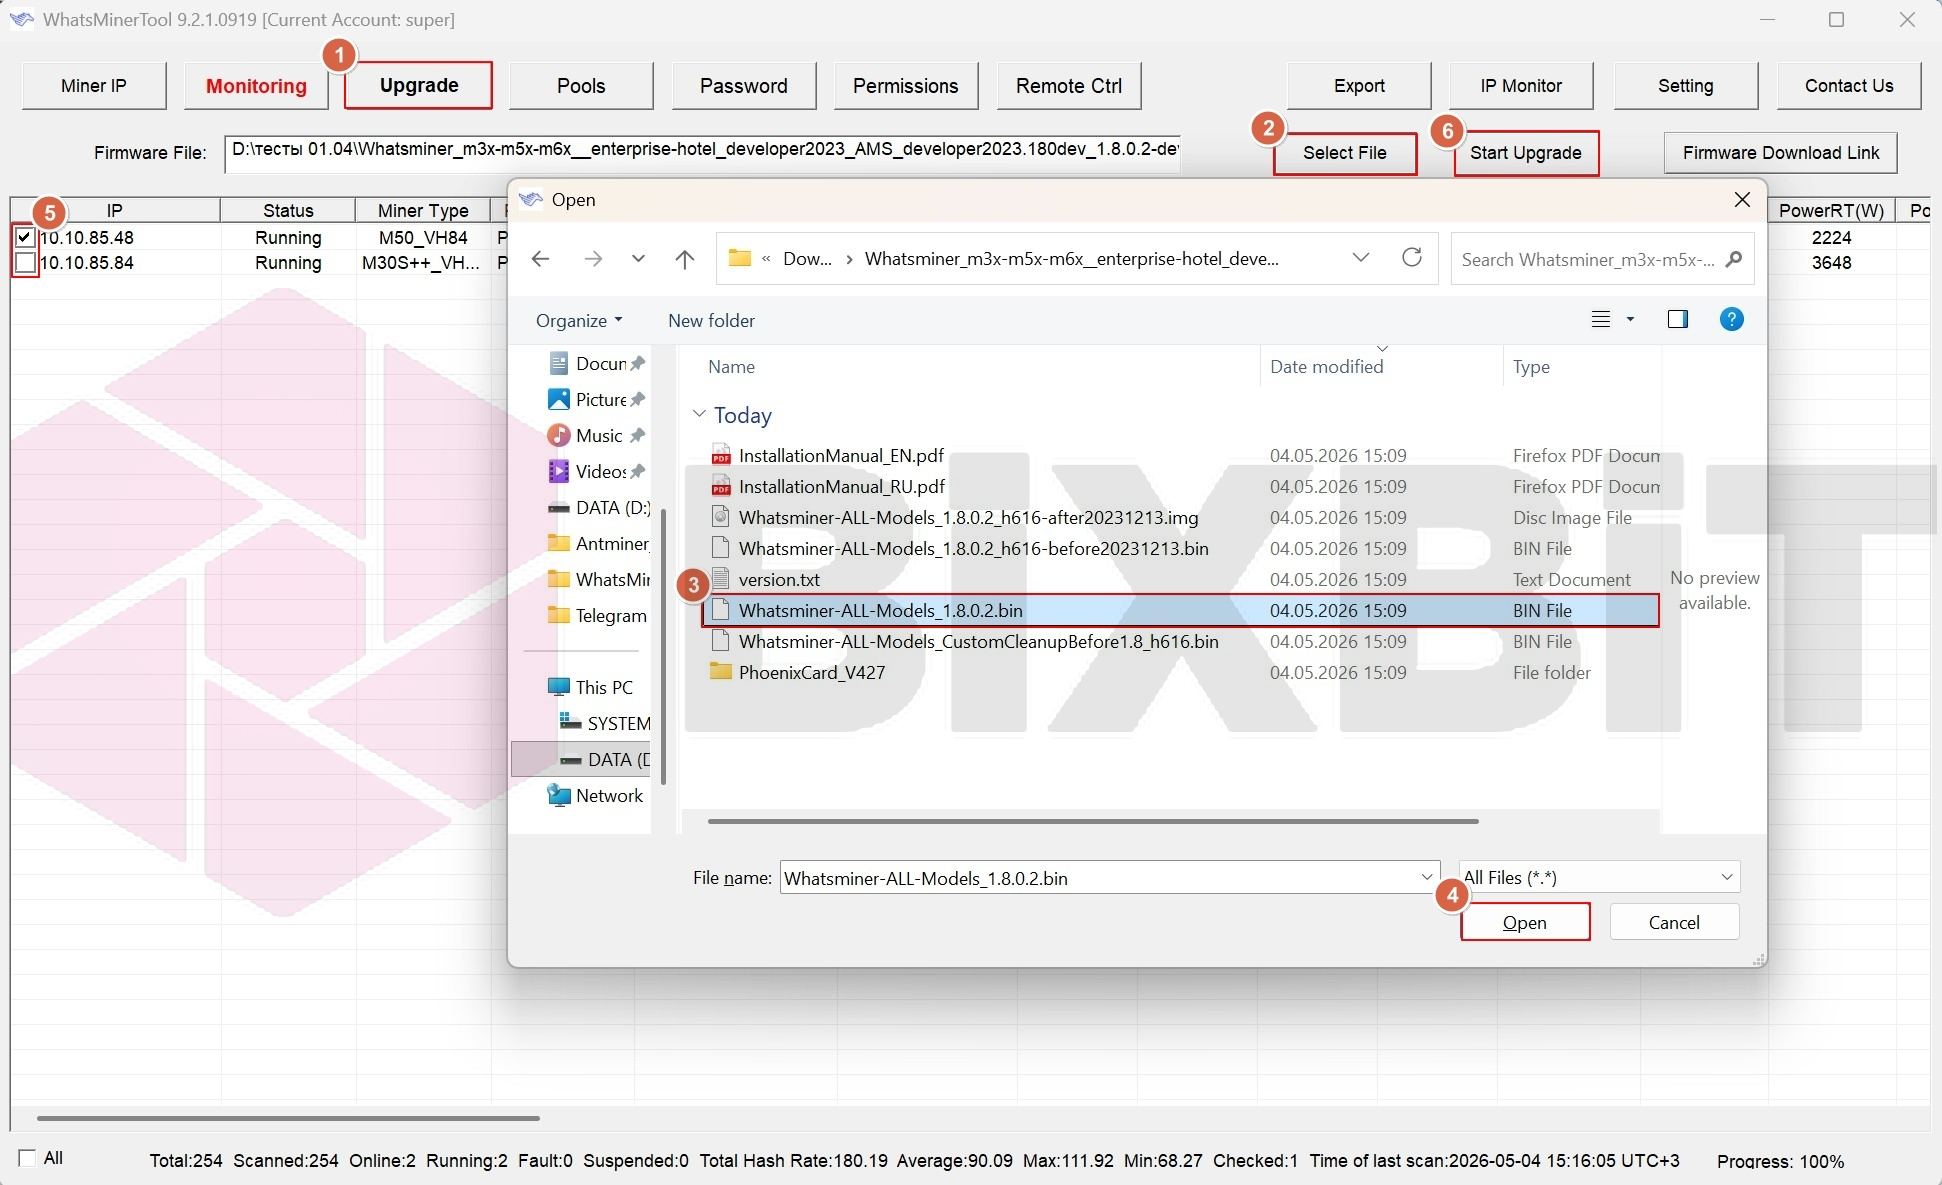
- Step 1: Click [Upgrade] ①.
- Step 2: Click [Select File] ②.
- Step 3: In the pop-up window, select the file "Whatsminer-ALL-Models_X.X.X.X.bin" ③ from the archive you previously downloaded and extracted (X.X.X.X is the firmware version).
- Step 4: Confirm the file selection by clicking [Open] ④.
- Step 5: Check the box to the left of the IP address of the device ⑤ whose firmware you want to update. You can select multiple devices if they had the intermediate firmware version installed.
- Step 6: Click the [Start Upgrade] button ⑥ to start the update process. In the dialog box that appears, click [OK].
INFO
A status of Success in the Status column for the device being updated indicates that the installation process completed successfully. The device will then automatically restart.