

Factory Firmware Installation and Rollback
Antminer
In some cases, installing BiXBiT firmware may require a preliminary rollback of the factory firmware version to an older version.
WARNING
New factory firmware versions dated 2025-2026 most likely cannot be downgraded using the method described in this instruction.
For rolling back the latest factory firmware versions on Amlogic control boards, you can use a different rollback method — via USB-UART.
Required Equipment and Files for Flashing:
- Flash drive (recommended capacity up to 16GB):
- For Xilinx (zynq 7007), Beagle Bone (BB), CVitek (CV) control boards — microSD card.
- For Amlogic (AML) control boards — USB-A flash drive, or a microSD card with a USB OTG adapter from the flash drive to the control board's Micro-USB port.
- A PC or laptop with a port or adapter to connect the flash drive.
- Firmware image (can be downloaded from our repository: https://storage.bixbit.io/Antminer_s/SD/).
INFO
If the goal is to install BiXBiT firmware, it is not necessary to select a factory firmware image specifically for the ASIC miner model. The main requirement is to choose an image that matches the control board model.
For Amlogic or Xilinx control board models, you can use universal firmware images. After flashing the control board with these universal images, the ASIC miner most likely will not mine on the installed factory firmware. However, you will then be able to install BiXBiT firmware on top of this factory firmware, where the device model will be detected automatically and the device will be able to mine.
Preparing the Storage Device and Loading the Firmware Image:
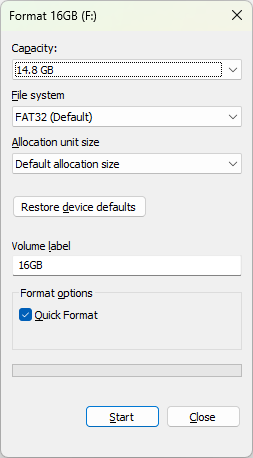
- Connect the flash drive to your computer or laptop and format it (using the FAT32 file system).
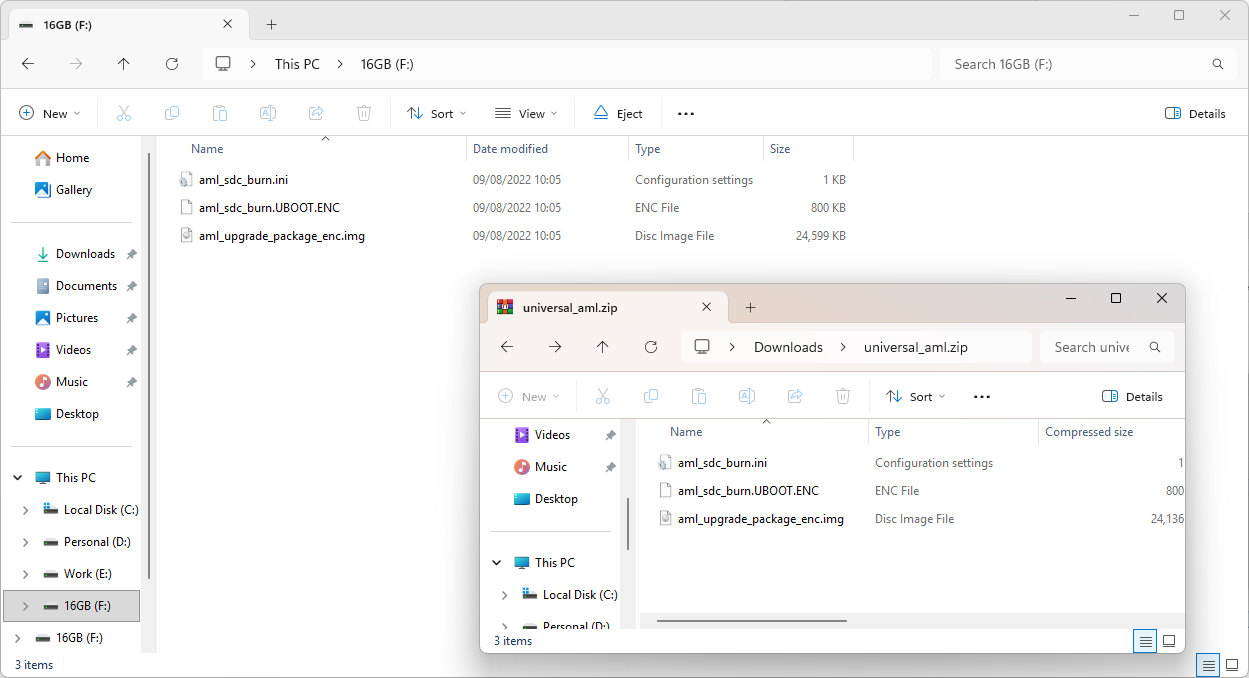
- Copy the contents of the downloaded firmware archive to the root of the flash drive.
Installing the Firmware on the Device:
- Disconnect power from the device and wait until the LED indicators on the control board turn off.
- Connect the storage device with the firmware image to the control board.
- Power on the device and wait for the flashing process to complete (when the installation is finished, the green LED on the control board will remain steadily lit).
- Disconnect power from the device and wait until the LED indicators on the control board turn off.
- Remove the previously connected storage device from the device.
- Power on the device.
Whatsminer
Installing Factory Firmware via WhatsMinerTool
Preparation
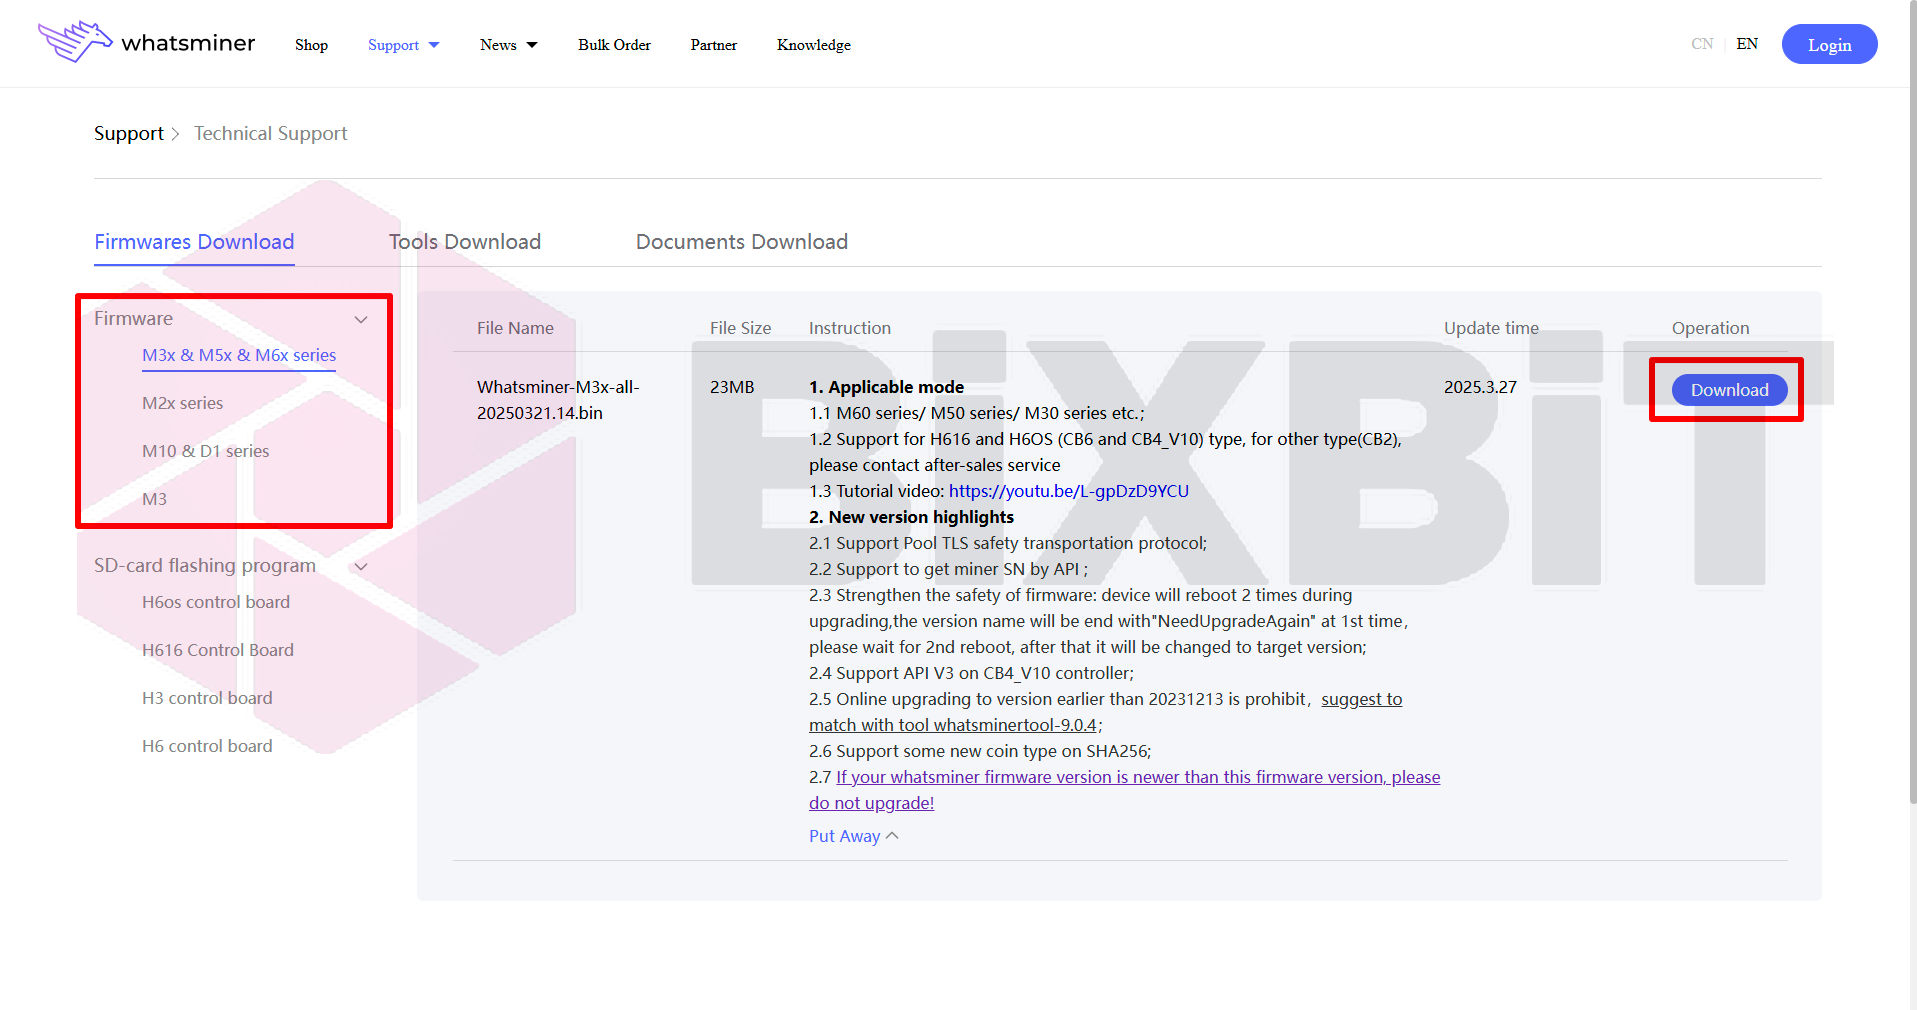
Step 1. Download the firmware file from the official website (in the "Firmware" section, select "M3x & M5x & M6x series" or "M2X series" depending on your device model and download the “.bin” firmware file (e.g., "Whatsminer-all-xxxxxxxx.xx.bin").
Step 2. Install the latest version of WhatsMinerTool. Using old versions of the program may cause the firmware installation to fail. You can download the latest version of WhatsMinerTool from this link.
Installing the Firmware
Run WhatsMinerTool and set a scan range that includes the IP address of the device for firmware installation. Start the scan and make sure the device appears in the list.
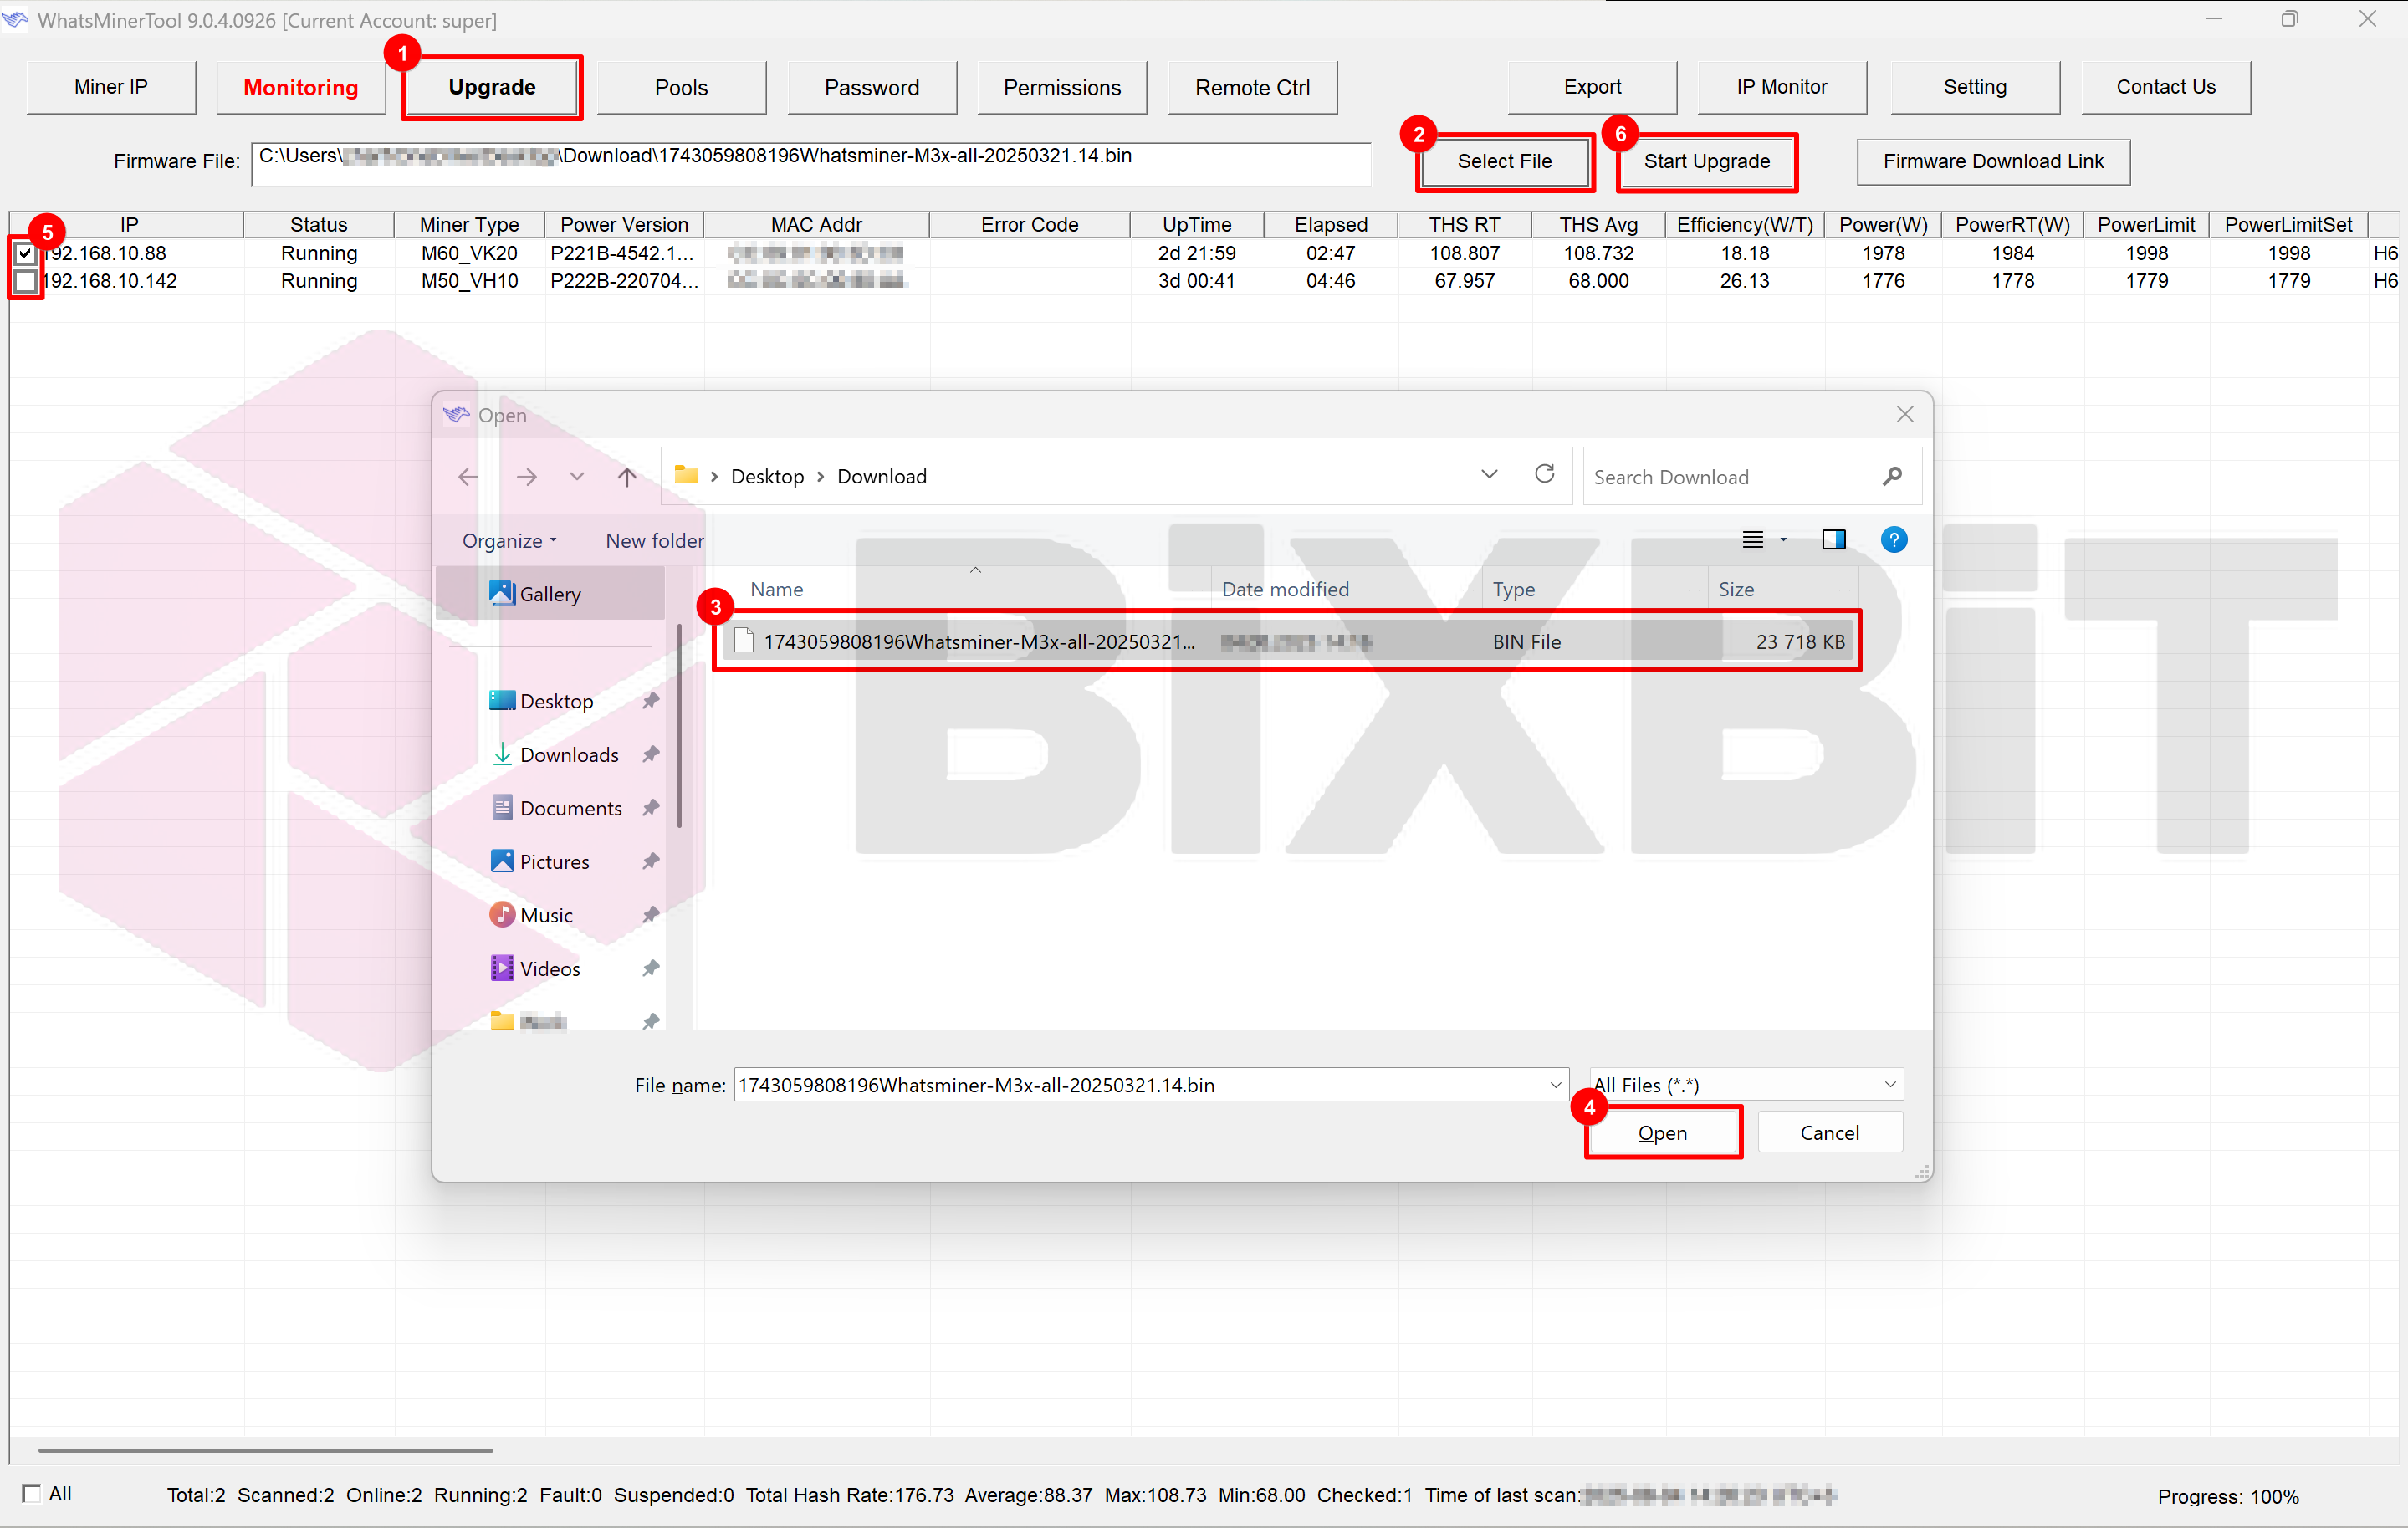
- Step 1: Click [Upgrade].
- Step 2: Click [Select File].
- Step 3: In the pop-up window, select the “.bin“ file you downloaded earlier (e.g., "Whatsminer-all-20250915.16.bin").
- Step 4: Confirm the file selection by clicking [Open].
- Step 5: Check the box to the left of the device's IP address whose firmware you want to update. You can select multiple devices if they have the same control board models installed.
- Step 6: Click the [Start Upgrade] button to start the update process. In the dialog box that appears, click [OK]. A status of Success in the Status column for the device being updated indicates that the update process completed successfully. The device will then automatically restart. After the reboot, open the device's web interface. If the installation was successful, you will notice changes in the device's web interface.
Installing Factory Firmware via SD Card
Preparing for Installation
- Step 1. Go to the Whatsminer website, in the "SD-card flashing program" section, select the section corresponding to the control board model installed on your device and download the firmware archive. Extract its contents to a separate folder.
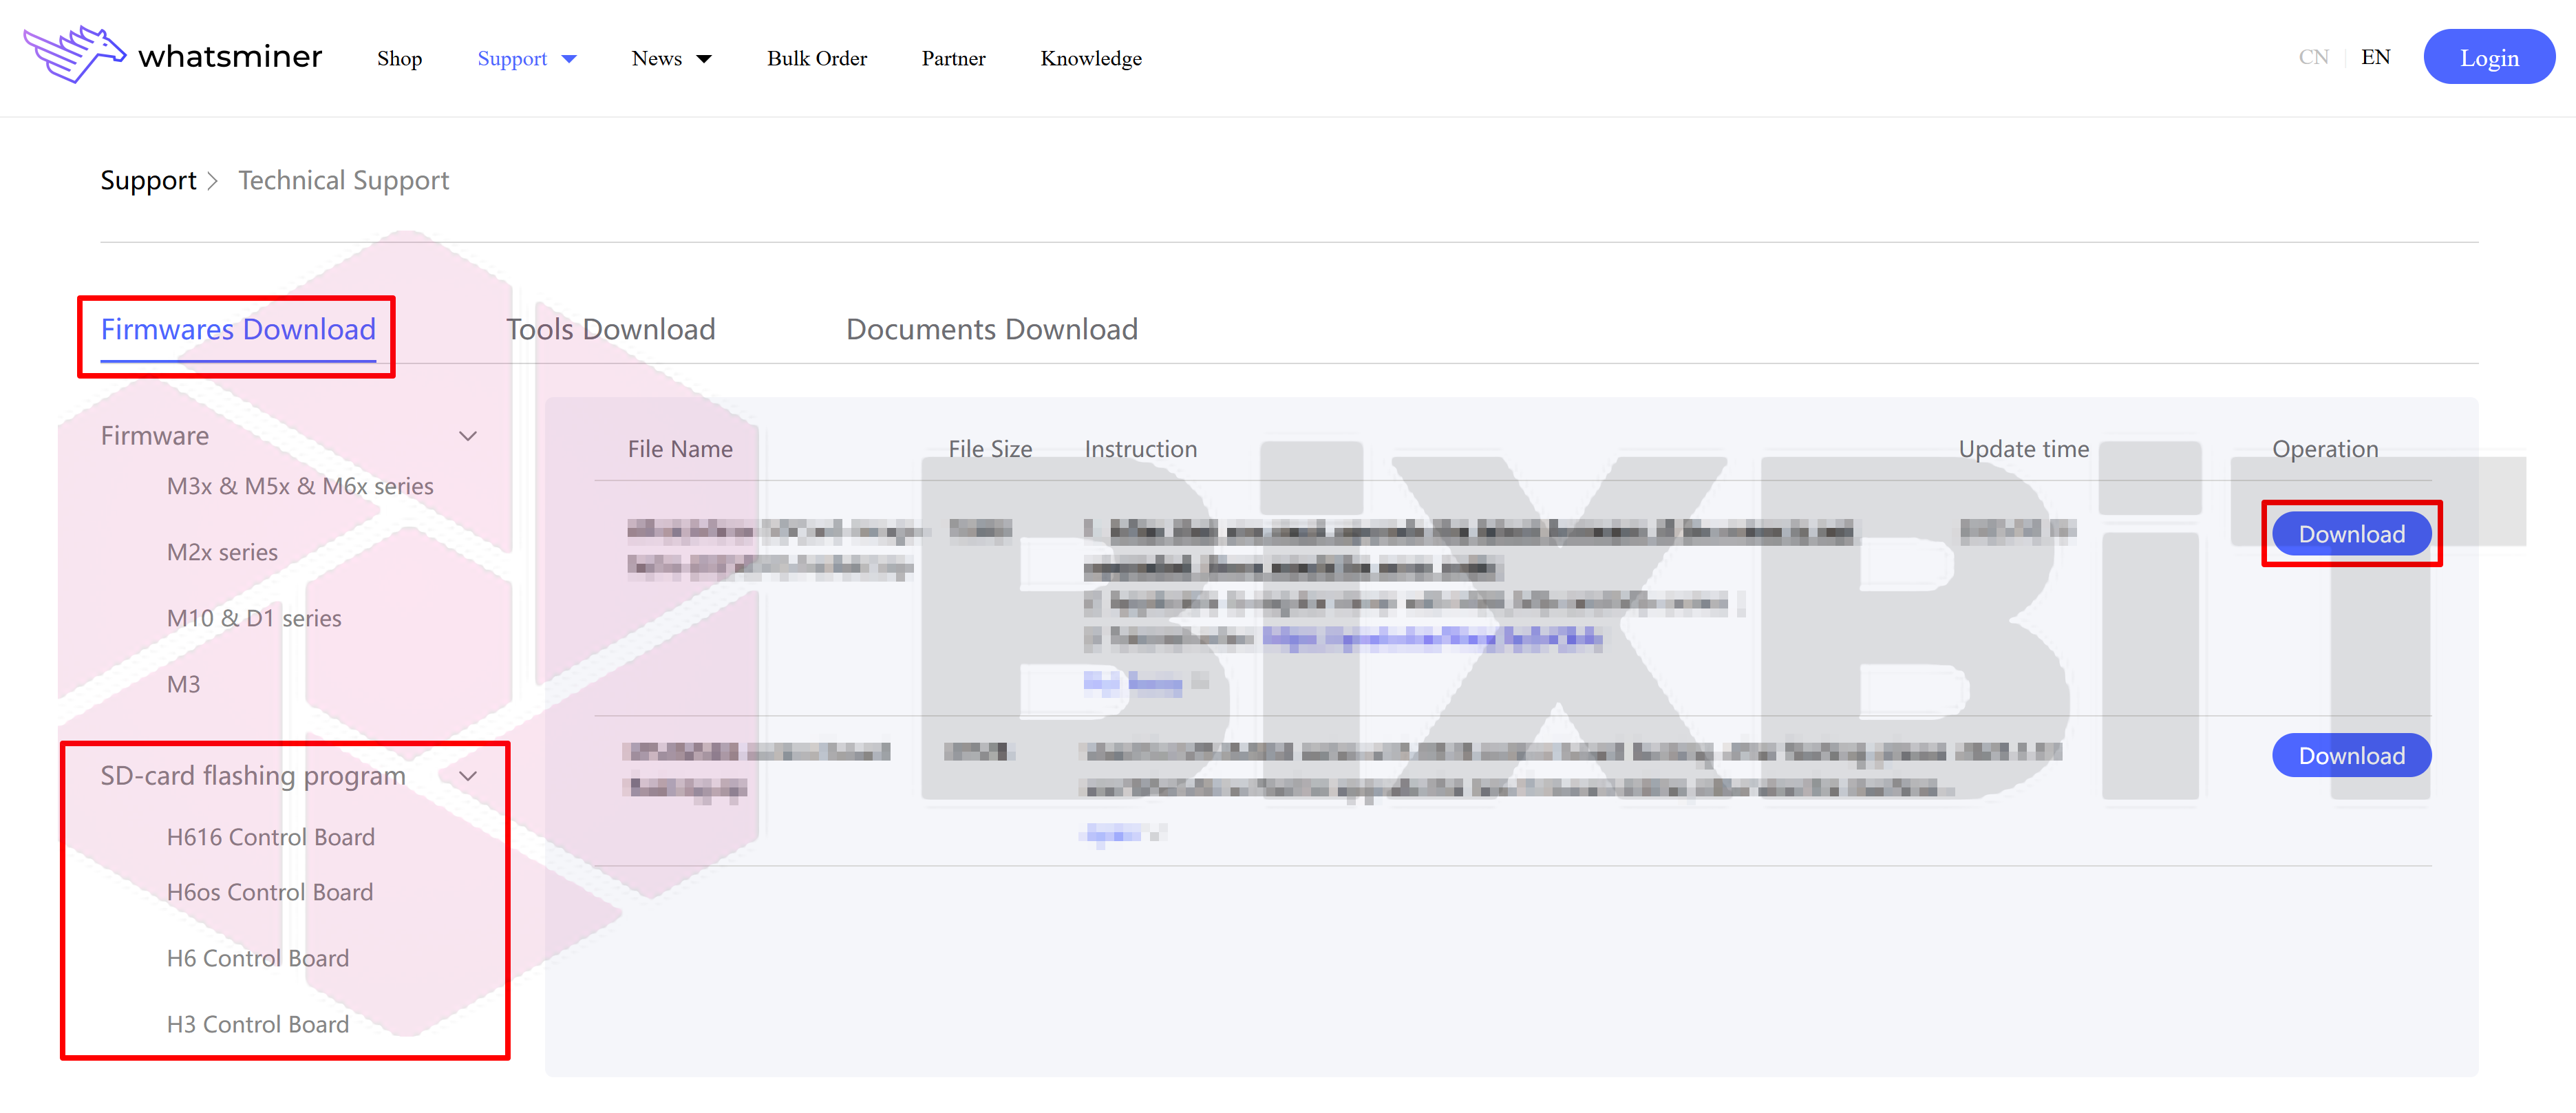
- Step 2. Prepare the SD card: It is recommended to use SD cards with a capacity from 2 GB to 16 GB inclusive. Fully format the SD card using Disk Management (right-click on the Start button, select Disk Management, default file system format FAT32).
- Step 3. Using the "PhoenixCard" program (the folder with the "PhoenixCard" program is located in the firmware archive), write the “.img” image of the downloaded factory firmware to the SD card.
Flashing the ASIC with the Factory Firmware Version Using the SD Card
- Step 1. Before inserting the SD card, disconnect the power cable and wait for the indicators to stop blinking completely.
- Step 2. Insert the SD card and reconnect the power cable.
- Step 3. After the flashing process is complete, only the green indicator will be lit. Wait a few seconds, then disconnect the power cable again.
- Step 4. Make sure the indicators have completely turned off, then remove the SD card.
- Step 5. Reconnect power.